
ルーフスポイラーの取付けは少しコツがあるので以下で解説していきます。
There are some tricks to installing a roof spoiler, so I will explain them below.
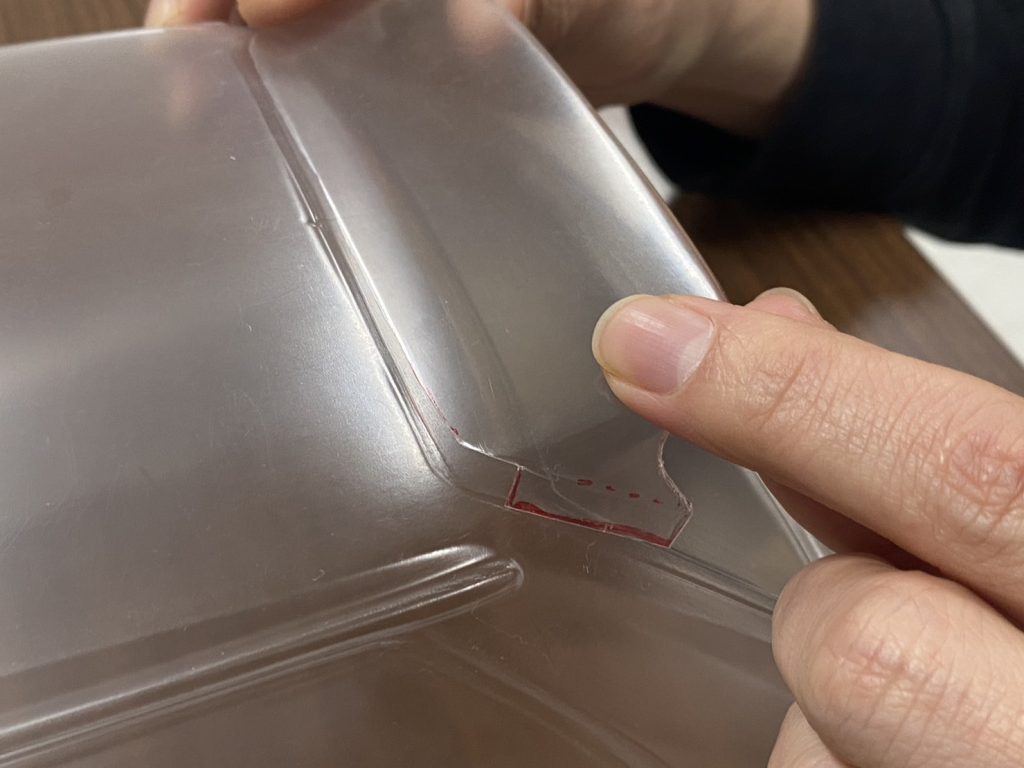
まずは切り出したルーフスポイラーとボディの固定位置を把握します。ボディのラインとスポイラーのラインを重ねると分かりやすいかと思います。
First, figure out where to fix the cut out roof spoiler and the body. I think it will be easier to understand if you overlap the body line and spoiler line.
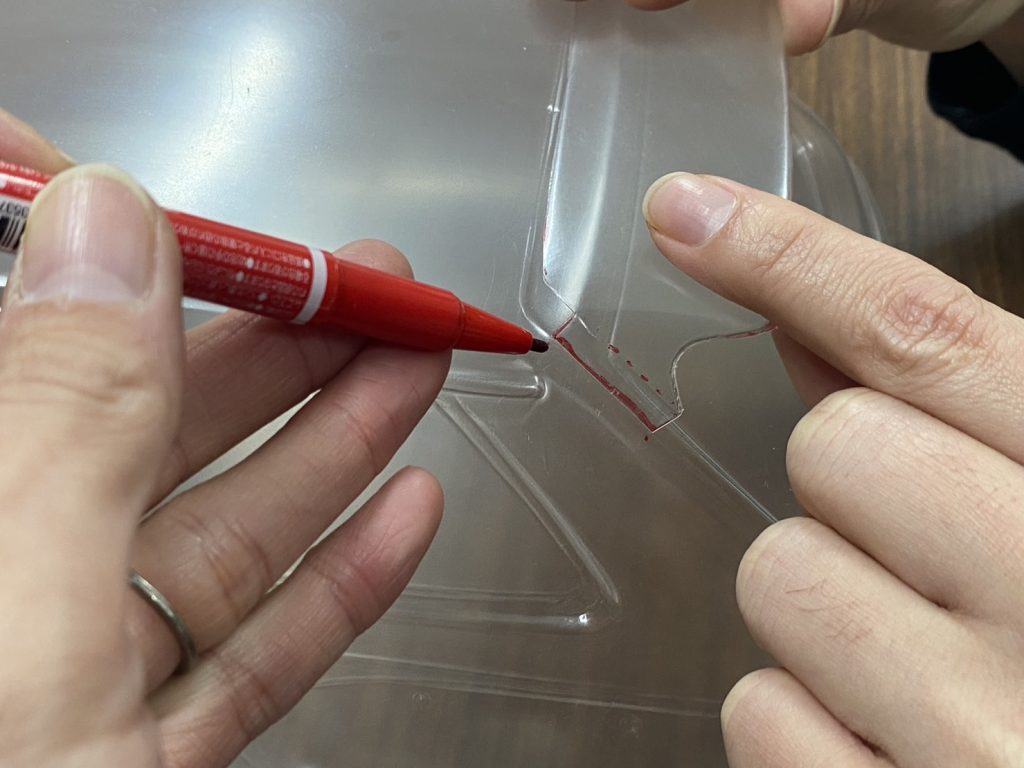
位置が決まったら、ペンなどで印をつけます。
Once you have determined the location, mark it with a pen.
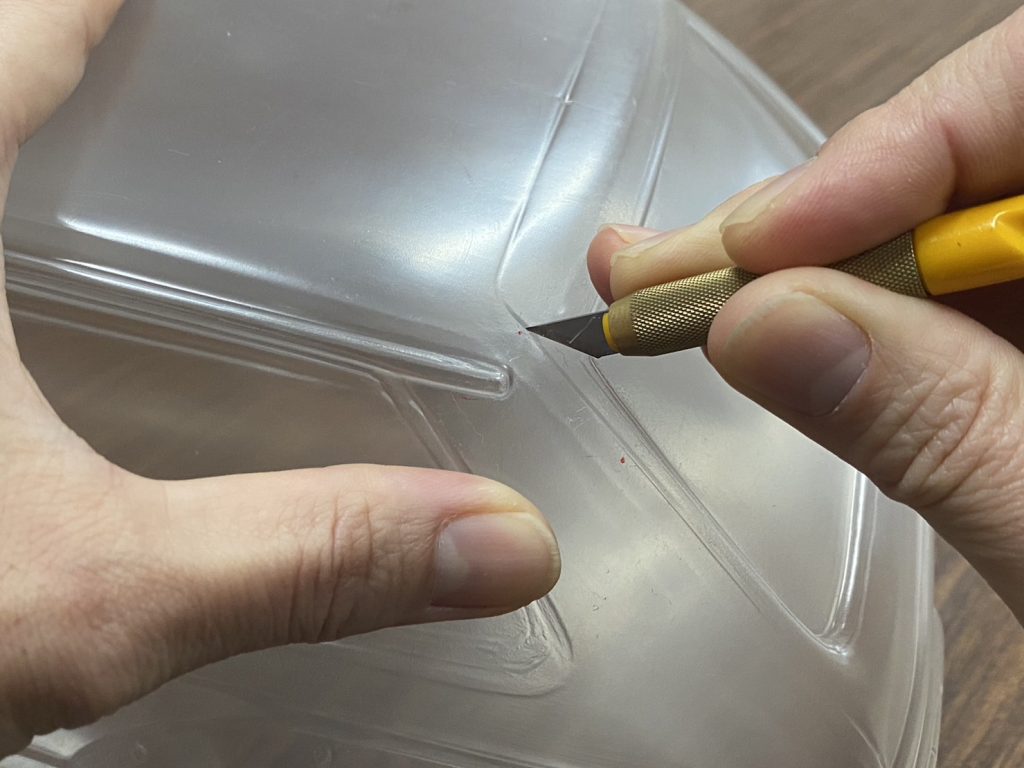
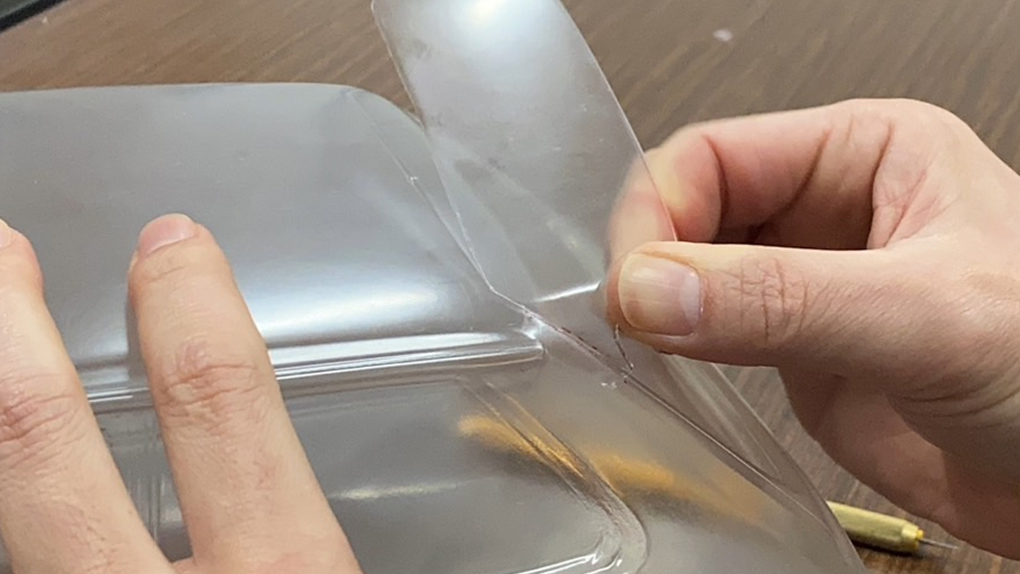
印に従って、デザインナイフなどで切り込みを入れていきます。ボディが固いので滑らないように注意しながら切り込みを入れて下さい。少しずつ押し込むようにカットすると良いかと思います。
Following the marks, make incisions with tools like a design knife. As the cutting areas are tough, please be cautious not to slip while making incisions. It’s advisable to cut by gradually pushing in.
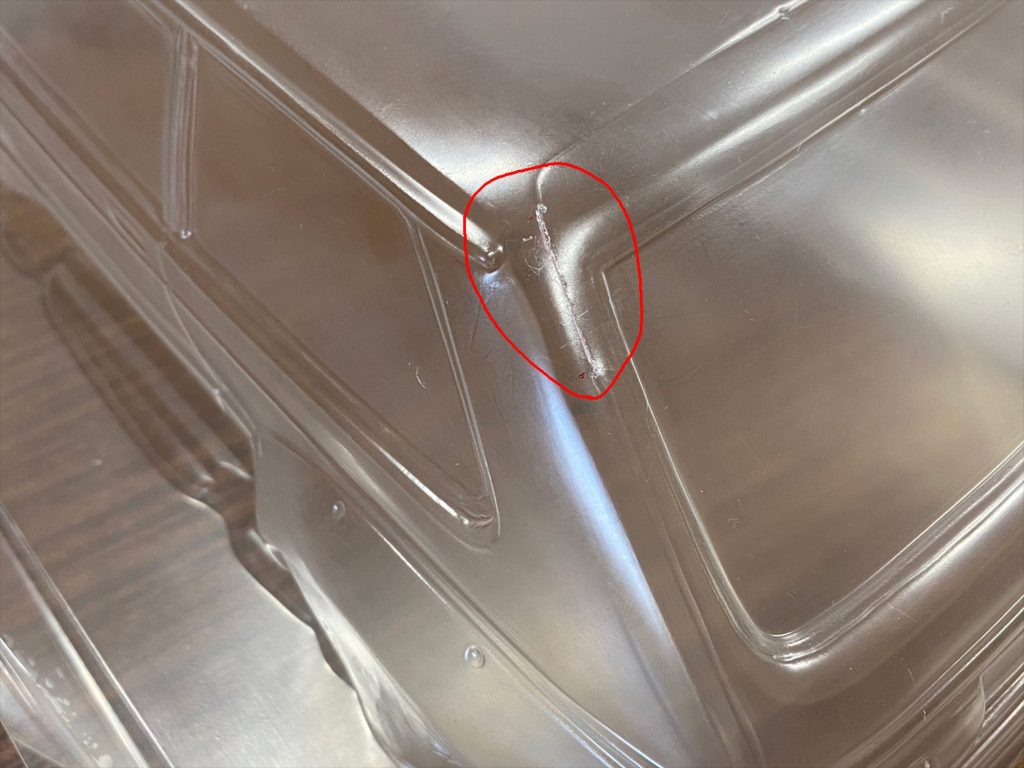
このように切り込みを入れれたらOKです!
If you can make a cut like this, it’s OK!
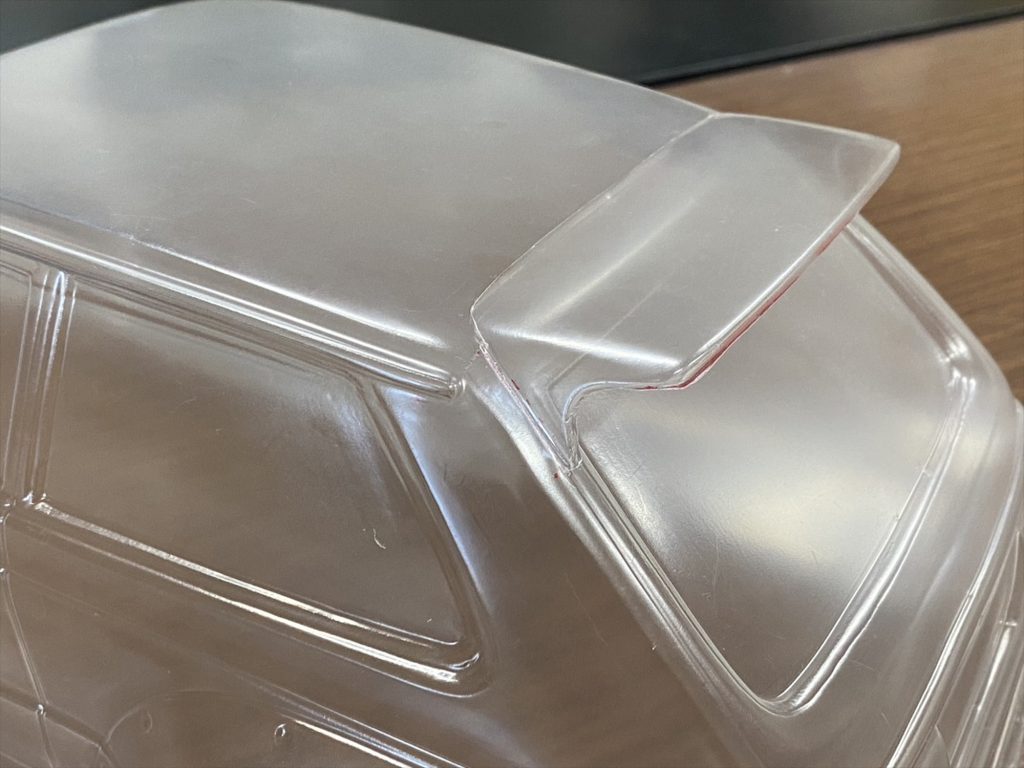
画像のように片側から差し込んで装着していきます。差し込みにくい場合は、スポイラーの差し込み部分の角をカットなどで調整してみてください。
Insert and install it from one side, as shown in the image. If it’s difficult to insert, consider adjusting the corners of the spoiler’s insertion part with cuts or other methods.
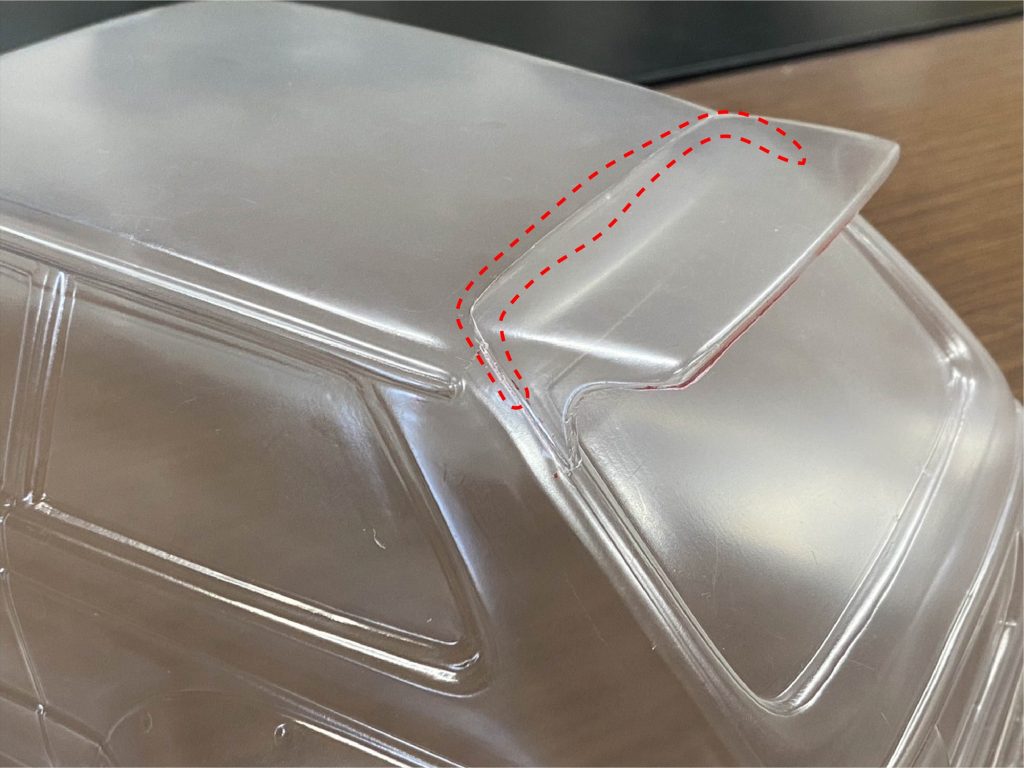
装着完了です。反対側も同様に固定していきましょう。
Installation is complete. Fix the other side in the same way.
差し込みする方法が手間だと感じる方は・・・
If you feel that the insertion method is a hassle…
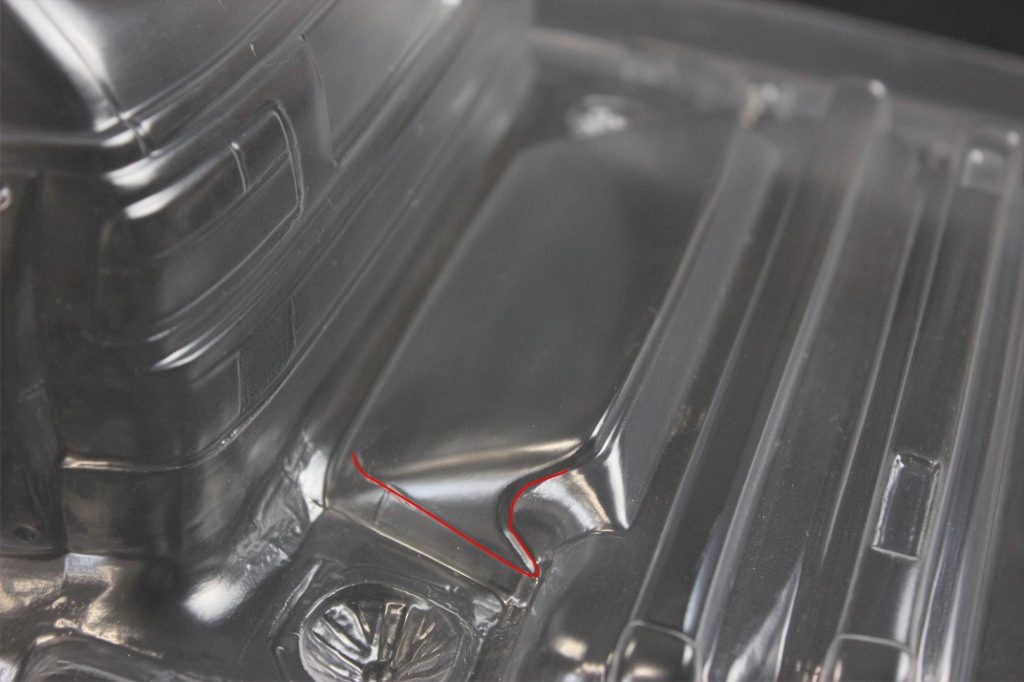
上記で紹介した差し込みしろを残さずにスポイラーを切り出してください。
Cut out the spoiler without leaving any remaining insertion tabs mentioned above.
赤点線を目安にシューグーなどの接着剤(ポリカを浸食しない接着剤)で固定する方法もあります。(もちろん裏側から接着してくださいね!!)
You can use adhesive (adhesive that doesn’t corrode polycarbonate) to secure it along the red dashed lines as a guide. (Remember to apply it from the back side!)
以上、参考になれば幸いです!!
I hope the above is helpful! !
今回解説したボディはこちら
>>>Toyota スターレットKP61 前期 N2仕様 [PABG-3066]
コメント